Throughout the first tutorials, you've learned about finalToon's Line Styles and how to quickly create some fairly basic looks for your objects. But at this point, you're probably wondering how you can create some more advanced, organic looking Line Styles. This tutorial should give you a much better handle on this aspect of finalToon.
Advanced Line Styles
finalToon has some very sophisticated controls for building Line Styles that look like they were drawn by an artist. Things like variable line weight (how thick the lines are) and some human inaccuracy in the precision will go a long way to creating a convincing 2D look.
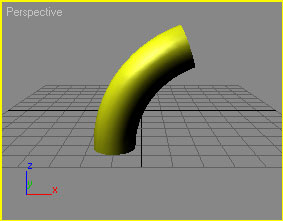
Open the file named slash_pen.max. This file is installed into your \Scenes\cebas\finalToon folder.
This scene already has a very organic Line Style applied to it.
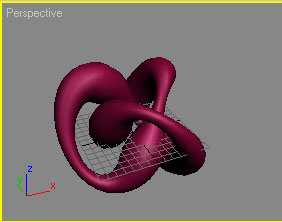
Render the Perspective viewport to see the effect.
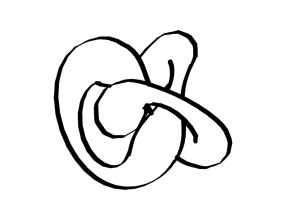
As you can see, when rendered, the torus does not look like it was computer generated and it appears to have been drawn with a technical marker (called a Slash Pen - hence the name of the file). Let's examine how this was done.
From the main 3ds Max toolbar, select Rendering>Effects, and select the finalToon entry.
Open the Default Edges rollout and click on either of the default 1 entries beside the Visible Fold or Visible Creases entries to open the Line Editor. (they are instanced, so changing one changes both)
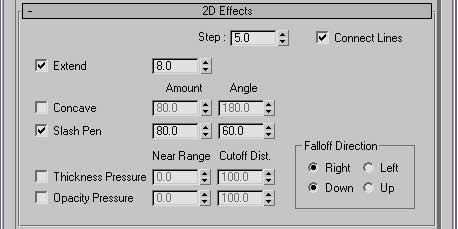
Within the Line Editor, open the 2D Effects rollout.
You will see the two effects are active: Extend and Slash Pen as shown below.
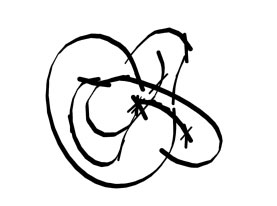
Within the Slash Pen controls, change the Angle spinner from 60 to 360. Re-render the Perspective viewport.
The results show that the thickness of the lines have shifted. A slash pen does not have a nice pointed tip like normal writing pens, then have a rectangular tip good for marker drawings. The Angle spinner determines how finalToon's virtual slash pen's tip touches the paper.
Change the Angle value back to 30.
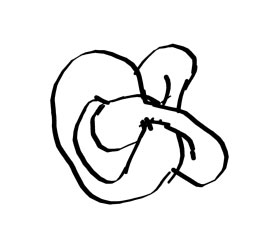
Next we'll look at the Extend effect present in our scene. If you look in the 2D Effects rollout, you'll see that the Extend checkbox is active. But what does it do? Let's turn it off to find out.
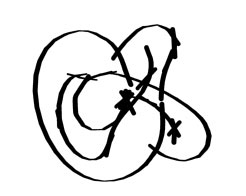
Turn the Extend checkbox off and render your Perspective viewport.
Now the overlapping of the line ends is gone. That is what Extend does - it finds where the lines are supposed to end and "extends" them out further, giving the appearance of a hand-drawn image. It is a very easy way to create good 2D sketch looks. Of course, there are plenty of other controls within the Line Editor to further enhance that organic look. Let's take a look at them next.
Go to the Rendering Effects dialog and turn on the Interactive checkbox.
Now back in the Line Editor, open up the Noise Effects rollout.

Turn on the Noise Line checkbox and change its Amount spinner to 80.

You can see the jitter in the line now. It's as if the artist had WAY too much caffeine. What's important to note here is that the line is actually been distorted off of the surface of the mesh. This is a really powerful feature.
Next, change the Noise Line Frequency spinner to 0.1.
Now instead of getting the very jagged look, the Line Style now takes on a much more organic, young child-like feel.
There are literally thousands of combinations that can occur when you create specific looks for your projects. As such, finalToon provides you with a way to store the Line Styles you create - giving you the freedom to build up a library of looks that you can load, tweak and render quickly. Up to this point, you've been building Line Styles. Now it's time to see how easy it is to build your library of looks.
Close the Line Editor from the previous section and go to the Render Effects dialog.
Within the Default Edges rollout are two buttons: Load and Save. Click on Load.
From the Load dialog, select Hand-drawn_01.fts. It may take several moments to load the Line Style, but once loaded, your render should automatically update to reflect the changes as shown below.
finalToon comes with a number of *.fts files that you can use right away - either directly or as a starting point to further refine and tweak to your liking. Just remember that when you load or save a Line Style, you are actually saving everything about that look. All of the line types you have defined (Visible Fold, Visible Creases, Hidden lines, etc.) will be stored in the *.fts format. Try a few out and see what they look like!
You can also save specific line type settings (such as just the Visible Fold) from within the Line Editor using the Load and Save buttons there. When you save here, the settings associated with that one line type are saved to a *.ton file.
Beyond standard 2D effects that are mathematically calculated, there is another way within finalToon to control the Line Styles: Mapping. We'll look at this option next.
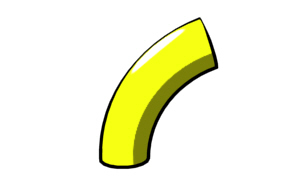
Open the scene named map_light_control.max. This file is installed into your \Scens\cebas\finalToon folder.
This is a very simple scene, but it will help to show exactly how powerful a map-based Line Style can be.
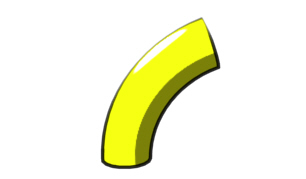
Render the Perspective viewport.
Notice that the line where the light hits is thinner and where the shadow exist a thicker line. You might be wondering how this effect was created. Let's look at it.
On the main toolbar, click Rendering>Effects to open the Render Effects dialog. Click on the finalToon entry to bring up it's parameters.
Open the Default Edges rollout and click on the default 1 button next to the Visible Fold to bring up the Line Editor.
There are several rollouts here that you haven't explored yet. One of the is the Edge Maps rollout.
Click on the Edge Maps rollout to open it. Within it are a number of map options, and next to the Thickness spinner you can see that there is a Falloff map associated with it.
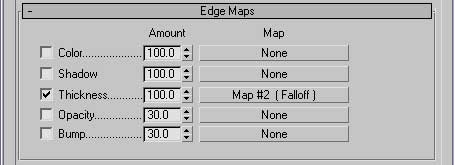
When you deal with Edge Maps, you need to have the Material Editor handy so that you can load maps into it and adjust their parameters.
Open the Material Editor and select the Falloff map swatch.
As you can see, it is set to Shadow/Light, and the two color swatches control how thick the line gets. In general terms, the brighter the swatch, the thicker the line; the darker, the thinner the line is. Of course, in this example, the portion of the Falloff map that is white controls the thickness on the shadow side of the object, and this is why we get a thicker edge away from the light source in the scene.
Go back to the Line Editor and activate the Opacity checkbox. Drag and drop the map from the Thickness slot above into the one next to the Opacity spinner. Choose Instance.
Change the Amount spinner to 100.
Re-render the Perspective viewport.
You can see now that the Falloff map makes the line more transparent as it gets closer to the highlights on the cylinder. Be aware that the spinners can go above an Amount of 100, so you can "force" even more extreme effects out of the same maps.
Turn the Opacity checkbox off.
Activate the Bump checkbox and click the button connected to it.
Choose a Cellular texture map (leave the defaults) for this effect and render again.

You can see now that the position of the Line Style is now controlled by the Cellular texture. And since the mapping for the finalToon lines can be animated just like any other 3ds Max material, you can create some really outrageous effects in a short span of time using the mapping features.
At this point, you should probably start experimenting with different combinations of Edge Maps and 2D Effects to build you own looks and Line Styles. Or better yet, load one of the pre-built Line Styles that comes with finalToon and use that as a jumping off point to design your own style.