In this next tutorial, we'll introduce you to the basic concepts and functionality of the finalToon Hatching map, so that you can start to produce some more artistic output on the surfaces of your finalToon objects. As has been mentioned before the other tutorials, this material is very similar to what is presented in the Hatching demo video included on your CD-ROM, and you are encouraged to watch that material prior to doing this tutorial so that you have a good understanding of the concepts presented within.
finalToon Hatching
Open the scene hatching_start.max. This file is installed into your \Scenes\cebas\finalToon folder.
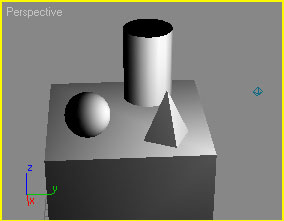
This is a very simple scene designed to show you some of the benefits and fuctionality of the finalToon Hatching map.
Next, open the Material Editor, and you'll be presented with the one material in the scene.
Open the finalToon - Shader rollout for this material.
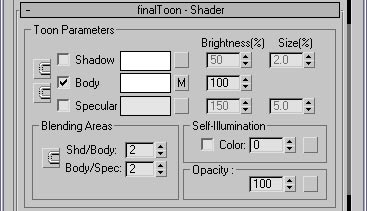
You should see that only the Body color of the finalToon shader is active, and that it has a map associated with it.
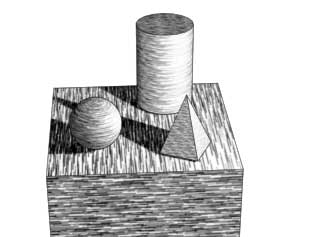
Render the Perspective viewport.
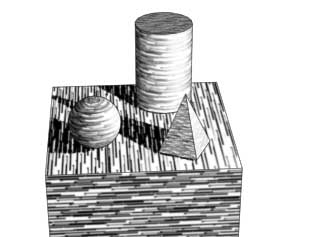
The hatching strokes cover all of the objects, and are denser within the shadowy areas. If you were to turn on the Shadow color within this material, all of the darker hatching that is occuring would be replaced by the solid shadow color. So generally speaking, you probably only want to use the Body color for your Hatching styles.
Go to Maps rollout and select the finalToon Hatching map that is associated with the Body color. It will bring up the following options:
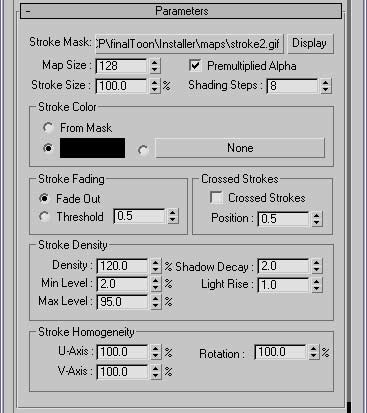
Now the first thing you noticed when you rendered the scene is that the hatching strokes were rather large for the scene itself. We'll fix that next.
Reduce the Map Size to 64 and re-render.
Notice that the stroke are much bigger. That's because the Map Size takes the image you feed it (in this case, the stroke2.gif) and creates a square map around it for repeating. So in this case, you're going from a 128x128 pixel map down to a 64x64 pixel map. That results in bigger, blockier strokes. Not really what we want.
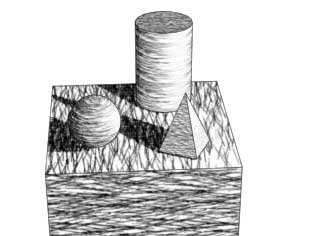
Increase the Map Size to 256 and re-render.
The strokes now appear much smaller and more hand-drawn. One other important note before we move on. If you start to increase the Map size significantly, you can crush your render times since it will be creating huge square bitmaps and filling them with the stroke. It is best to stay somewhere in the range under 1024 pixels.
Now the image is better, but it still isn't where we want it - it's still to regular and even.
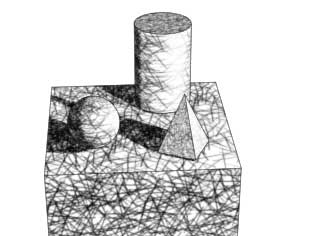
Activate the Cross Strokes checkbox to add more hatching to your pattern.
Re-render the Perspective viewport.

Now within the shadowy areas are extra strokes that are currently perpendicular to the original strokes.
Within the Stroke Homogeneity group of controls, change the Rotation spinner to 80%. Render to view the results.
As you can see, adjusting the rotation begins to loosen up the stroke direction. Instead of all pointing in the same direction, you now get some more variation and crisscross patterns emerging from the rendered output. Now let's produce some more contrast in this image. We can do this within the Strokes Density group of controls.
Change the Shadow Decay spinner to 10.0 and render.

Now you can start to see a much heavier shadow area (especially along the back of the sphere and cylinder) Light Rise works in a similar fashion except that it punches up the areas where there is direct illumination on your scene. You'll find these two spinners to be invaluable as you try to fine-tune your images.
The other aspects of the Stroke Density group of controls work in a similar fashion. We recommend that you watch the demo videos to get a better understanding of their output control as they are very simple and straightforward.
Now when it comes to the orientation of the strokes, you need to work with the Stroke Homogeneity group of controls. Here you'll find a number of spinners that lets you define whether strokes are more prevalent in one axis or another, and how they are rotated. Let's take a quick look at those controls.
Change the value of the Rotation spinner to 10 and render the Perspective viewport.
Now the strokes are wildly different in their orientation. This kind of hatching can produce some very interesting results on your objects provided the scaling is adequate.
Change the U-Axis spinner to 2 and render your view.
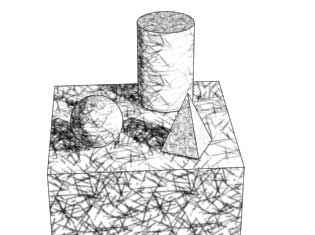
What this does is tell the finalToon Hatching map that only 2% of the strokes should be placed in the U-Axis of the bitmap it creates. The same goes for the V-Axis spinner. The results of this kind of control mean that you can induce the hatching pattern to have "holes" or gaps in it when rendered, further enhancing the illusion that is was sketched by hand and not generated by a computer.
Of course, this only scratches the surface of Hatching in general. Our advice is to load up several of the included strokes and see what works for you. finalToon can even use a text bitmap as a stroke pattern! So use your imagination and have fun experimenting.